
🌱 GrowMore CookMore App
Know what to sow, when to harvest, and discover recipes for your garden produce.

Right, I’m going to tell you about the best-kept secret in gardening. It’s free. It’s everywhere. And most people rake it up and chuck it in the green bin every autumn like it’s rubbish. I’m talking about leaves. Autumn leaves. Those beautiful golden, red, and brown things that fall off the trees every year and carpet every path, lawn, and flower bed in sight. Most people see them as a nuisance. I see them as gardening gold. Because those leaves, with a bit of time and absolutely zero effort, turn into leaf mould — the finest soil conditioner you’ll ever use, and it costs you nothing except a bit of patience.
I discovered leaf mould about five years ago when Ronny showed us the contents of a wire cage behind his shed. It looked like rich, dark, crumbly chocolate cake. It smelled like the forest floor after rain. “That’s two years’ worth of leaves, that,” he said, running his fingers through it like it was treasure. Which it basically is. Since then, I’ve been collecting every leaf I can get my hands on every autumn, and the difference it’s made to my soil is unbelievable. Plants grow stronger, the soil holds water better, worms love it, and I haven’t had to buy a bag of compost in years. Absolutely belting.
What Is Leaf Mould and Why Is It So Good?
Leaf mould is what you get when fallen leaves decompose slowly over one to two years. Unlike regular compost, which is broken down mainly by bacteria and produces heat, leaf mould is broken down by fungi. It’s a cold, slow process that produces a completely different end product. Where compost is nutrient-rich and feeds the soil, leaf mould is all about structure. It improves soil texture, water retention, and drainage all at the same time. Sounds contradictory, but it works — it opens up heavy clay soil to improve drainage, and adds water-holding capacity to light sandy soil. It’s basically magic.
The stuff is incredible as a mulch. Spread it around plants and it suppresses weeds, retains moisture, feeds the soil organisms, and looks absolutely beautiful — like a proper woodland floor. As a seed compost (when it’s well-rotted and sieved), it’s the equal of anything you’ll buy in bags. And it’s free. Did I mention it’s free? Because that matters when you’re going through wheelbarrows of the stuff every season.
Here’s a fact that’ll make you think twice about binning your leaves: a single mature oak tree drops about 250,000 leaves every autumn. That’s roughly enough raw material to produce three or four wheelbarrow loads of leaf mould. And most people just… throw that away. Mental.
Don’t put leaves in your regular compost bin — they take too long to break down and they’ll slow down the whole composting process. Keep them separate. Leaves need their own dedicated space where fungi can do their thing without being rushed by the hot bacterial composting happening in your main bin.
Collecting Leaves — How to Gather Your Raw Material
Autumn leaf collection is one of those jobs that’s actually quite satisfying once you get into it. I spend a few weekends in November gathering leaves from my plot, the paths around the allotment, and — here’s the sneaky bit — from the local park. Nobody minds. In fact, most park keepers are happy for you to take them because it saves them bagging them up. I rock up with a few bin bags and rake like a man possessed. JB thinks I’ve lost it, standing there on a Saturday morning raking up someone else’s leaves. But he also borrows my leaf mould every spring, so who’s really lost it?
The best leaves for leaf mould are the ones that break down quickest. Oak, beech, and hornbeam leaves are the gold standard — they produce the finest, most crumbly end product. Birch, alder, and hazel leaves are also excellent. The ones to avoid (or at least keep separate) are thick, leathery leaves like holly, laurel, and evergreen magnolia — these can take three years or more to break down and are best shredded first.
Sycamore and horse chestnut leaves work fine but are slower than oak and beech. Conifer needles are acidic and should be kept separately — they make a brilliant mulch for acid-loving plants like blueberries, rhododendrons, and azaleas, but they’re not ideal mixed in with everything else.
If you’ve got a lawn mower, running it over the leaves on your lawn before collecting them is a brilliant trick. The shredded leaves decompose much faster than whole ones — roughly twice as fast in my experience. You can also use a dedicated leaf blower/vacuum that shreds the leaves as it collects them. I use my mower on its highest setting, let it chop the leaves up, then rake the shredded bits into bags. Works a treat.
Making a Leaf Mould Bin — Cheap and Easy
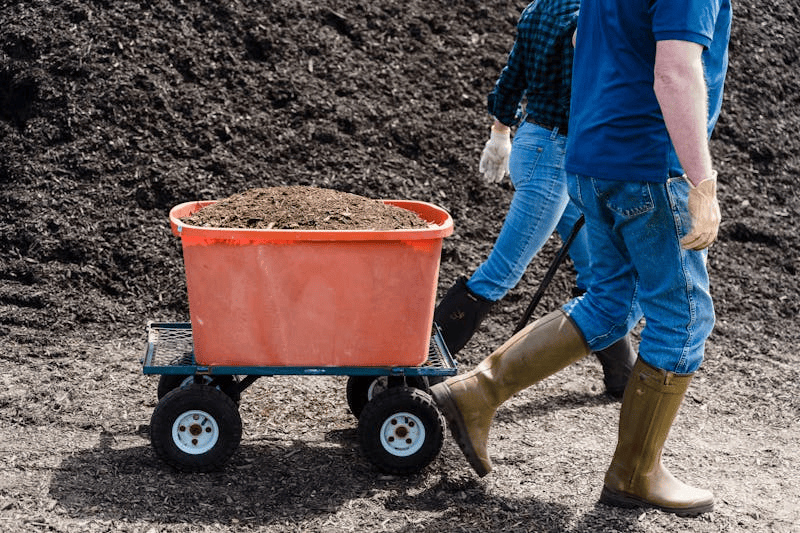
You don’t need anything fancy to make leaf mould. The simplest method is the bin bag approach. Take black bin bags, fill them with damp leaves (if they’re dry, wet them first), poke a few holes in the bags for ventilation, tie them loosely at the top, and stack them behind the shed. Come back in 12-18 months and you’ll have leaf mould. Honestly, that’s it. The bins do nothing more than keep the leaves contained while the fungi do all the work.
But if you want to do it properly (and make more of the stuff), build a leaf mould cage. It takes about thirty minutes and costs almost nothing. Get four wooden stakes or old fence posts, hammer them into the ground in a square about a metre on each side, and wrap chicken wire or mesh around them to create an open-topped cage. Fill the cage with leaves and let nature do its thing. You can make it any size you want — I’ve got two cages, each about 1.5m square, so I always have one batch cooking while I’m filling the other.
The beauty of the cage method over bin bags is that the leaves get more air circulation and more rain, both of which speed up decomposition. They also get colonised by worms and other decomposers more easily because they’re in contact with the soil. My cage-made leaf mould is consistently better and faster than the bin bag stuff.
The biggest enemy of good leaf mould is dryness. If the leaves dry out, the fungi stop working and nothing happens. Check your leaf pile occasionally, especially in dry spells, and give it a good watering if it’s looking dry. Conversely, if it’s absolutely waterlogged, that’s not great either — the leaves will go slimy and anaerobic rather than breaking down properly. You want it damp, like a wrung-out sponge. In a normal British autumn and winter, rain will do most of the watering for you.
The Two Stages of Leaf Mould
Leaf mould has two distinct stages, and both are useful for different things.
Year 1 (young leaf mould): After about 12 months, the leaves will have partially decomposed into a brown, flaky material. It won’t look like finished compost — you’ll still be able to see leaf shapes, just darker and more crumbly. This young leaf mould is perfect as a mulch. Spread it around plants, on bare soil, or over beds as a winter covering. It’ll continue breaking down in place, feeding the soil as it goes. It’s also brilliant for adding to the bottom of planting holes for trees and shrubs — the roots love growing into it.
Year 2 (mature leaf mould): After 18-24 months, the leaf mould should have broken down into a dark, crumbly, soil-like material with a gorgeous earthy smell. This is the good stuff. Sieve it through a garden riddle (or a piece of old chicken wire over a wheelbarrow) and you’ve got a seed compost that rivals anything you can buy. You can also mix it 50/50 with sharp sand for an excellent potting compost, or blend it into your garden soil to improve structure.
I always have two batches going — last year’s leaves and this year’s leaves. When this year’s batch goes in, last year’s batch comes out. It’s a continuous cycle that means I never run out. Well, almost never. I did run out last spring because I’d been too generous with the mulching over winter. But that’s a good problem to have.
Using Leaf Mould — Getting Maximum Value
As a mulch: This is the simplest and most common use. Spread 5-10cm around established plants, fruit bushes, and trees. It suppresses weeds, retains moisture, protects roots from temperature extremes, and feeds the soil as it breaks down. I mulch all my fruit bushes, raspberry canes, and perennial beds with leaf mould every autumn. The worms pull it down into the soil over winter, improving the structure from below. It’s like having a free army of soil improvers working for you 24 hours a day.
As a soil conditioner: Dig well-rotted leaf mould into beds before planting. It’s especially good for heavy clay soil — the organic matter breaks up the clay particles and improves drainage dramatically. On my allotment, the beds where I’ve been adding leaf mould for five years are noticeably easier to dig and drain much better than the ones I haven’t treated. The difference is visible even from a distance.
As a seed compost: Sieved, well-rotted leaf mould makes an excellent medium for seed sowing. It’s fine-textured, retains moisture without waterlogging, and is relatively low in nutrients (which is actually what you want for seeds — too much nutrition causes leggy growth). Mix it with a bit of perlite or vermiculite for extra drainage and you’ve got a professional-quality seed compost for free.
As a potting mix component: Blend leaf mould with garden compost and sharp sand in roughly equal parts for a general-purpose potting mix. It won’t have the slow-release fertiliser that commercial mixes include, so you’ll need to start feeding after about six weeks, but the basic structure and water retention are excellent.
For woodland plants: If you grow shade-loving plants like hostas, ferns, primroses, or hellebores, leaf mould is their natural growing medium. Mulch them generously with the stuff and they’ll think they’re in a real forest. My hostas have never looked better since I started mulching them with oak leaf mould every autumn.
Speed It Up — Tricks for Faster Leaf Mould
The main complaint about leaf mould is that it takes too long. And fair enough — waiting two years is a pain when you want it now. But there are ways to speed things up significantly.
Shredding is the single biggest accelerator. Shredded leaves have more surface area for fungi to work on, so they decompose much faster. I’ve had shredded oak leaves turn into usable leaf mould in about 9 months instead of the usual 18-24. Use a mower, a garden shredder, or even a strimmer in a dustbin (seriously — put the leaves in a bin, stick the strimmer in, and let it chop everything up. Wear goggles for this one).
Moisture is key. Keep the pile damp and decomposition continues through winter. If it dries out, everything stops. In dry spells, give the pile a good soaking with the hose. Adding fresh green material (grass clippings, comfrey leaves) in small amounts can also speed things up by introducing nitrogen that feeds the fungi.
Turning the pile once or twice during the year helps too — it redistributes moisture and introduces air, both of which help the decomposers do their job. I fork my leaf mould cages over once in spring and once in summer. It’s not essential but it knocks a couple of months off the process.
- Collect fallen leaves in November — your garden, paths, local parks
- Best types: oak, beech, hornbeam, birch, hazel — avoid evergreens
- Shred leaves with a mower for faster decomposition
- Build a wire mesh cage (1-1.5m square) or use punctured bin bags
- Keep leaves damp — water in dry spells, like a wrung-out sponge
- Turn the pile once or twice during the year to speed things up
- Year 1: use as mulch around plants, fruit bushes, trees
- Year 2: sieve for seed compost or mix into potting compost
- Run two batches: one filling, one maturing, for continuous supply
- Never put leaves in the green bin again — they’re too valuable!
The GrowMore CookMore app is dead useful for keeping track of your leaf mould batches. The Garden Journal lets you note when you started each batch, what type of leaves went in, and when it’s ready to use. You can even track how much money you’re saving by making your own soil conditioner instead of buying bags from the garden centre — the cost tracking feature adds it all up for you. Once you see the numbers, you’ll be even more motivated to collect every leaf you can find. Trust me on that one.
Look after yourselves. Take good care. 🌱
Leave a Reply