Seedlings coming on inside Tony's polytunnel
First Season — or Your Tenth · UK Polytunnel Growing

Your First Polytunnel

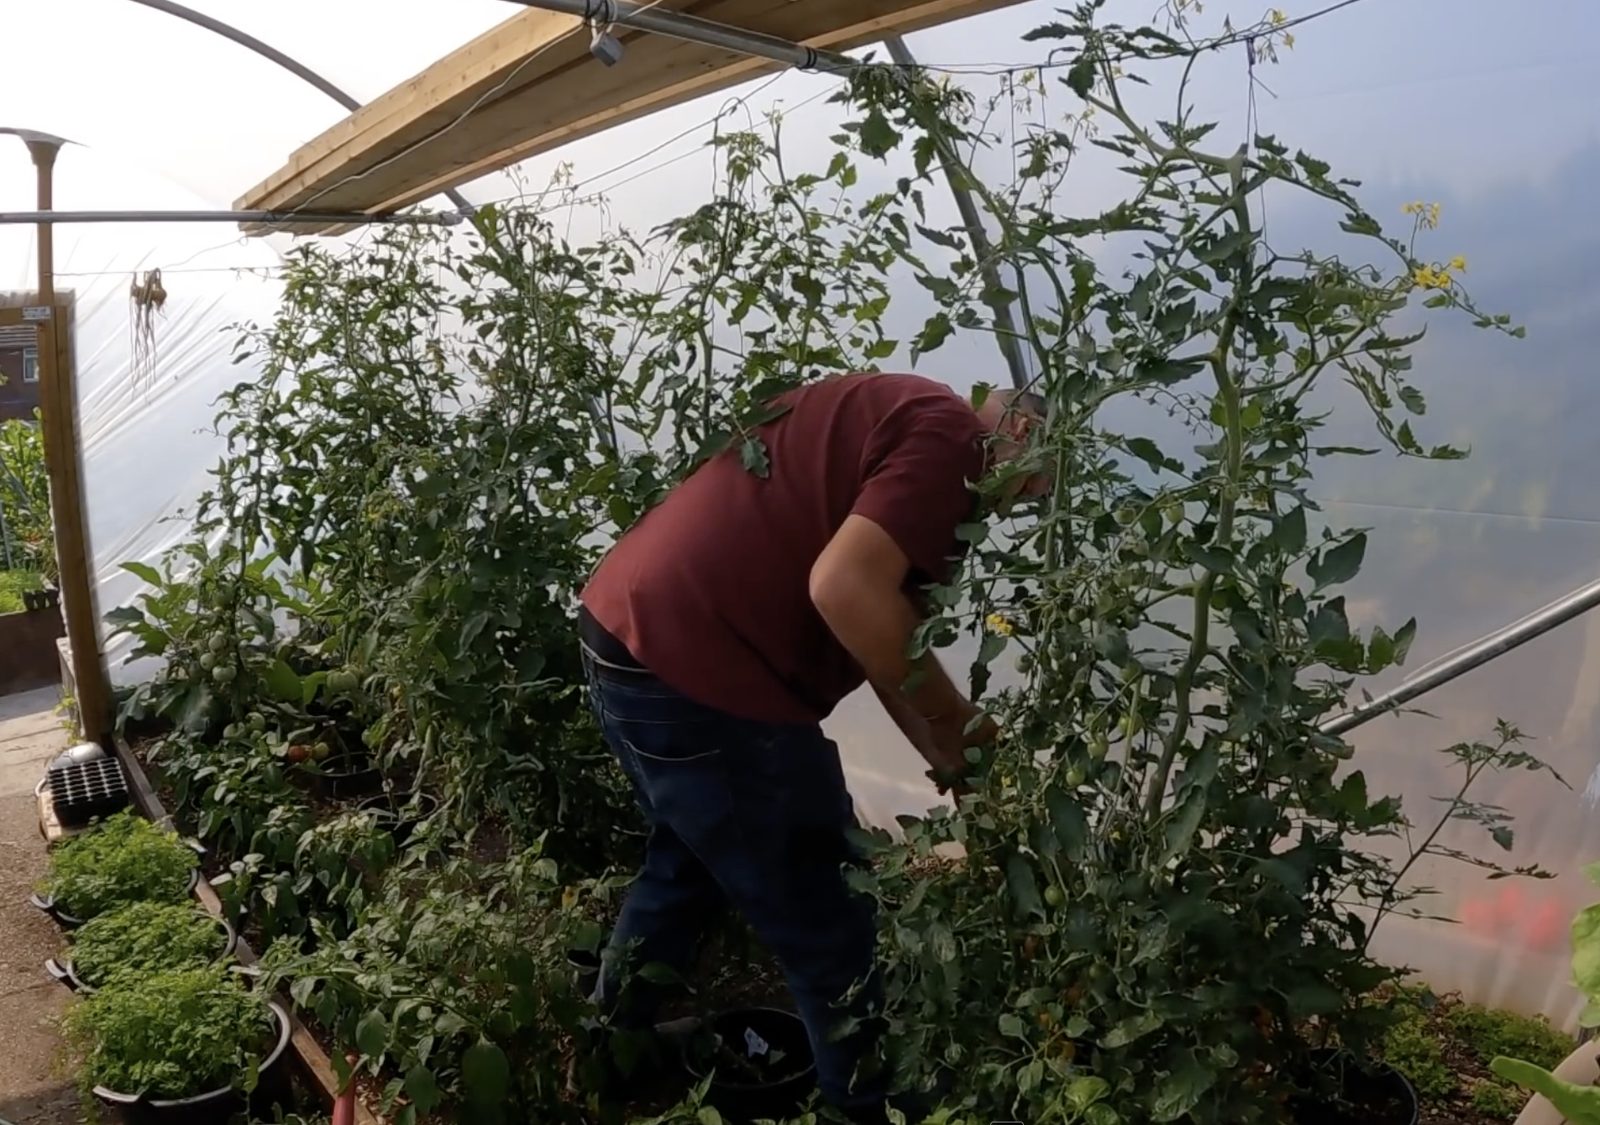
Everything you need to choose it, put it up, and grow in it all year round

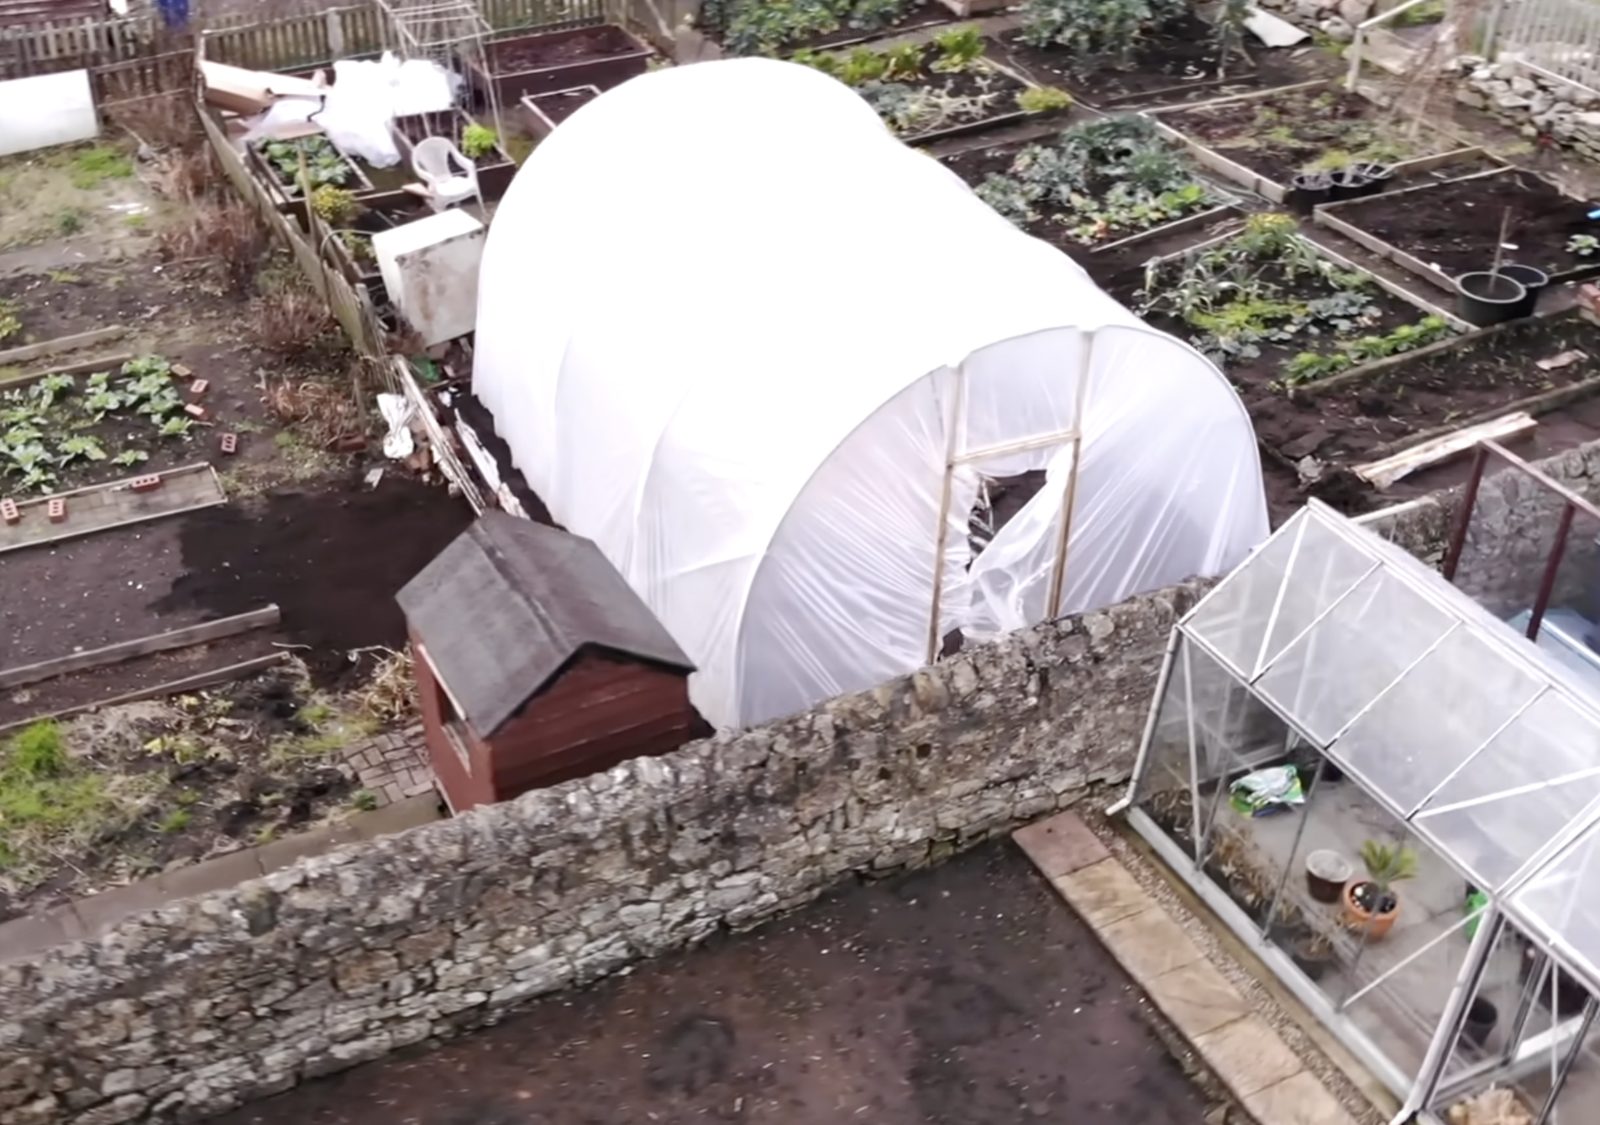
Fifteen practical modules — from picking the right manufacturer and getting it standing straight, to laying out your beds, growing right through the depth of winter, and patching it back up when the wind has a go at it. Whether it’s your very first tunnel or you’re upgrading from a homemade one held together with hope, this is the proper grounding.

Get the course — £27

One payment · lifetime access · 30-day no-quibble refund

Read a free sample lesson — no email needed →
15
Written modules
£27
One payment, lifetime access
30 days
No-quibble refund

Does any of this sound like you?

You've decided you want a polytunnel — but there are a hundred makes, sizes and price tags, and you've no idea which one's actually worth the money.

Maybe you've already got one up — but it cooks everything by May, drips with condensation, and you're not sure what's going wrong.

You don't know which way it should face, where to site it, or how to lay the inside out so it actually works for you.

Every sunny day it turns into an oven, and you're forever firefighting heat, damp and whatever's eating your crops this week.

The guides you've found are either trying to sell you a tunnel, or written for someone with a heated glasshouse — not a real UK plot.

You know a tunnel should let you grow more, for far longer — but right now it feels like it's beating you rather than helping you.

If any of that hit home — this course is exactly what I built for you. Every single one of those was me, not that many years ago. And it's not just for first-timers, by the way — if you've had a tunnel up for years but never cracked the heat, the watering, or why the same things keep going wrong under cover, this'll fill those gaps and all. And I've put everything I learned the hard way into these 15 modules.
The polytunnel from outside

The proper one. Put up the right way, it's shrugged off every gale since.

Tony Smith inside his polytunnel
Tony Smith North East England
Polytunnel grower &
course creator

I built a rubbish one first. So you don't have to.

My first polytunnel was one I cobbled together myself. Scaffold poles, a bit of timber, a roll of polythene and a lot of optimism. It looked the part for about a fortnight. Then the cover started flapping, the wind got under it, and one proper gale later it was wrapped round my fruit bushes like a crisp packet. I'd skimped on the bits that mattered, and I paid for it.

So I saved up and bought a proper one — a manufactured frame, a decent cover, put up the right way. And the difference was night and day. Suddenly I understood what a tunnel is actually for, and how much it changes what you can grow and for how long.

I make YouTube videos about my plot now, and barely a week goes by without someone asking which tunnel to buy, which way to face it, or why theirs is cooking everything by June. So I put it all together properly. Everything I wish someone had told me before I wasted money on that first homemade effort. Plain language, for real people with real plots — not a glossy book written for somebody with a heated Victorian glasshouse.

This is that course.

“Everything I wish someone had told me before I wasted money on that first homemade effort.”

15 modules. Everything you need.

Click any module to see what's covered. Work through them in order, or jump to what you need right now.

1Choosing the Manufacturer
Where it all starts — and where most money gets wasted. What actually matters in the frame and the cover, the sizes that make sense, cheap vs proper, and the kit that'll still be standing in ten years. Plus my homemade disaster, so you know exactly why this matters.
  • What to look for in the frame and fittings
  • Cover grades — and why they matter
  • What size you actually need
  • Cheap vs proper: the real cost over time
2Orientation — Which Way It Should Face
Where to put it and which way to face it. Getting the light right, working with the wind instead of fighting it, and the siting mistakes that'll haunt you for years.
  • North–south vs east–west, and why
  • Reading the wind on your plot
  • Light, shade and what's around it
  • Access and water — the practical stuff
3Mapping Out the Layout
Plan it on paper before a single pole goes in. Beds, paths, door ends and where the water goes — all sorted before you commit.
  • Sketching your layout to scale
  • Path widths that actually work
  • Making the most of the door ends
  • Planning for water and storage
4Erecting It
The bit everyone dreads. Foundations, frame, and getting that cover on tight and wrinkle-free without tearing it or losing your temper. Pick your day, get your helpers, do it right.
  • Groundwork and getting it square
  • Building the frame step by step
  • Getting the cover on — right way, right weather
  • Tensioning and finishing without tears
5Those First Few Days Inside
Settling it in and getting your bearings — the first jobs, condensation, and what to sort before you plant a single thing.
  • Your first-week checklist
  • Dealing with condensation early
  • Letting the ground warm up
  • Getting set up to grow
6Ventilation, Heat & Overheating
The number one polytunnel killer. How to stop it cooking everything to death on a sunny day in May — doors, vents, airflow and shade.
  • Why tunnels overheat so fast
  • Doors, vents and through-draughts
  • Shade netting and damping down
  • Reading the temperature through the day
7Laying Out the Beds
Ground beds, raised beds, borders, staging, containers — every option, the pros and cons, and what I'd actually do.
  • Ground beds vs raised beds
  • Borders and central beds
  • Staging and growing upwards
  • Paths and edging that last
8Watering & Irrigation
Under cover, no rain gets in — it's all on you. How much, how often, and the system that suits your tunnel without drowning or parching your crops.
  • Why tunnel watering is different
  • Cans vs drip vs leaky pipe
  • Watering routines through the seasons
  • Avoiding the damp-and-disease trap
9Your First Season's Grow
What absolutely thrives under cover, what to sow and when, feeding, and getting the most out of every square foot.
  • The best crops for a tunnel
  • A simple first-season sowing plan
  • Feeding for big, healthy crops
  • Squeezing the most from the space
10Pests Under Cover
The warm, humid tunnel is paradise for red spider mite, whitefly and aphids. Spot them early, keep them down, and the biological controls that actually work.
  • Red spider mite — the tunnel's worst enemy
  • Whitefly and aphids under cover
  • Biological controls that genuinely work
  • Keeping the environment against the pests
11Preparing It for Winter
Clearing down, checking the frame and cover, and securing it against the worst of the weather before it arrives.
  • Autumn clear-down and clean
  • Checking the cover and fittings
  • Storm-proofing the tunnel
  • Setting up for winter growing
12Growing Veg Through Winter
Yes, you can — and it's brilliant. What to sow, what'll keep going, and how to get fresh greens in the dead of winter.
  • What actually grows over winter
  • When to sow for winter crops
  • Protecting crops on the coldest nights
  • Fresh greens in January
13Cleaning & Maintaining It
Keeping the light coming in and the tunnel sound — the yearly jobs, and looking after it once it's a few years old.
  • Cleaning the cover, inside and out
  • The yearly maintenance checklist
  • Looking after an older tunnel
  • Keeping the frame in good nick
14Tapes, Patching & Repairs
Hot-spot tape for the poles, proper repair tape, patching small holes and big tears, and what to do when it splits — plus when a repair will see you right and when the cover's had it.
  • Anti-hotspot tape on the frame
  • Repair tape vs patches — what to use when
  • Patching holes and tears properly
  • When to repair vs when to replace
15Or Build Your Own
The homemade route, done properly this time. What I got wrong, what I'd do differently, and an honest look at whether it's worth it.
  • My homemade disaster — the full story
  • What I'd do differently now
  • Materials that won't let you down
  • Is DIY actually worth it?
Crops growing down the polytunnel beds
Beds laid out so every square foot earns its keep.
Inside the polytunnel in the evening light
Doors open before the heat builds — half the battle, that.

By the end of this course, you'll be able to…

Choose the right tunnel for your plot and your budget — and know exactly why it's the right one

Get it sited, faced and put up properly, so it stands firm and works with the weather

Lay out the inside — beds, paths and water — so every square foot earns its keep

Keep it from cooking in summer with the right ventilation, shade and airflow

Stay on top of red spider mite, whitefly and the damp-loving pests that thrive under cover

Grow right through winter and pull fresh greens in the depth of January

Get years of life out of your tunnel — cleaning, maintaining and patching it up as you go

Have a reference guide you'll come back to season after season, year after year

See exactly what you're buying

This is the actual opening of the free sample lesson — no polish, no trailer. The whole lesson is free to read.

From the free sample

Why Get a Polytunnel?

The honest truth about what a polytunnel can do for your growing — and what it can't. Everything you need to know before you spend a penny.

Right. So you've been thinking about getting a polytunnel. Maybe you've walked past one on someone else's allotment and seen them pulling out armfuls of tomatoes in September while yours outside have gone to mush with blight. Maybe you've seen them on YouTube or in a magazine and thought — could I actually do that?

Or maybe you've already got one sitting in a box in the shed and you're wondering what on earth you've let yourself in for.

Read a free sample lesson →

No email needed. If it's not your sort of thing, you'll know in five minutes.

This is a real tunnel, on a real plot

Not stock photos. My tunnel, my beds, my crops — the same plot the whole course was written on.

Tony's polytunnel at the allotment, golden hour

Golden hour at the plot. A tunnel changes what the whole year looks like.

A basket of crops grown under cover
A basket of crops grown under cover — that's the point of the thing.
An early lettuce harvest from under cover
Early lettuce, while the plot outside is still half asleep.
Tony with crops grown in the tunnel
Proof it works: me, grinning, holding the goods.
Tony working in the polytunnel beds
Down on my knees in the tunnel — where most of the real work happens.

Here's exactly what you get

15 complete written modules Full guides covering everything from choosing your tunnel to growing right through winter — practical stuff you can actually use
Written, not video — on purpose You can read it at the plot with muddy hands, skim back to the exact line you need, and it doesn't buffer in a polytunnel
Interactive checklists and tools Layout planners, ventilation checks, pest-spotting guides and more — built into the modules
Grow all year round From first-season crops to fresh greens in deep winter — get your tunnel working every month
Build-your-own tunnel module An honest module on building your own — what I got wrong, what I'd do differently, and whether it's worth it
Lifetime access — yours to keep One-time payment, no subscription, no expiry. Come back as many times as you like, any season.
Works on any device Read at home, on the bus, or on your phone in the tunnel — fully mobile-optimised

On price, honestly

Big-name growing courses run £95 and up. Professional qualifications run into the hundreds. This is £27 — because I'm one bloke with an allotment, not an academy. I'd rather it was in people's hands.

Tony Smith in his polytunnel

My No-Quibble Promise

Read the whole thing. If it doesn't save you at least one ruined crop, email me within 30 days and I'll refund you — no forms, no fuss. — Tony

Get the full course for £27

One-time payment. No subscription. Instant access to all 15 modules.

Complete course
Your First Polytunnel
The complete UK polytunnel course — all 15 modules
£27
One-time payment · lifetime access
Get the course — £27
Secure checkout  ·  30-day money-back guarantee

Or get all three courses — allotment, polytunnel and containers — together for £59 £81 if you bought them one at a time.

Questions? Here's everything people ask.

I've never had a polytunnel before. Is this course right for me?
Yes — that's exactly who it's for. It starts right at the beginning: choosing one, siting it, getting it up. You don't need any experience, just a plot (or the intention to get one) and the willingness to have a go.
I've already got a tunnel up. Will I still get anything from it?
Almost certainly, yeah. Most people with a tunnel up are only using half of what it can do — they wrestle with overheating, watering, winter growing and pests under cover. The course fills those gaps properly.
Is it video or written?
Written, on purpose. You can read it at the plot with muddy hands, skim back to the exact line you need, and it doesn't buffer in a polytunnel. No sitting through twenty minutes of video to find the one bit you wanted.
How long will it take me?
That's up to you. Read it cover to cover and it's a few good evenings' worth. But it's built to be used, not just read — most people get through the first few modules, crack on, then come back to the watering or pest modules when they actually need them. It's there whenever you are.
Is this relevant to my part of the UK?
Yes. It's written for UK growing specifically — our weather, our seasons, and the pests that thrive under cover here. Sowing and timing shift a little across the country (Scotland and the north are typically a couple of weeks behind the south), so you'll just adjust slightly for your area.
How do I access the course after buying?
Immediately after purchase you'll get a confirmation email with a link to your course welcome page. All 15 modules are there, ready to open. No apps, no logins — just click and read, on any device.
Will it be updated?
Yes. When I improve a module or add something new, you get it — lifetime access includes every update, at no extra cost. Buy once, that's it.
Can I buy it as a gift?
You can, aye. Gumroad has a gift option at checkout — tick the box, pop their email in, and the course lands with them instead of you. Decent present for anyone who's been threatening to get a tunnel for years.
What if I'm not happy with it?
Then I'll refund you, no questions asked, within 30 days. Just drop me an email at tonycsmithallotment@gmail.com. I want people to actually find this useful — if it's not right for you, fair enough.
Do I need anything special to read it?
Just a web browser — Chrome, Safari, Firefox, anything. Works on phone, tablet, laptop, desktop. No software to install, no app to download.
Why only £27?
Because I want people to actually buy it and use it. I've seen polytunnel guides charge a fortune for far less. This has 15 proper modules covering the lot — from choosing a tunnel to patching it up years down the line. I'd rather it be in more people's hands at a fair price than sitting on a shelf at an expensive one.

Growing more than one way?

This course is £27. Or get all three — allotment, polytunnel and containers — for £59. That's £81 if you bought them one at a time.

Get all three for £59

Right. Let's get you growing.

Everything I know about polytunnel growing — written up properly, in plain language, for anyone who wants to actually understand their tunnel — first season or tenth. It doesn’t have to be a guessing game. Let's do this properly.

Get the course — £27

One payment · lifetime access · 30-day no-quibble refund

From the plot, most weeks

A free email about what to sow now, what's working and what I've ruined lately. No spam, unsubscribe whenever.